

Introducing the newly redesigned Budget Power-Up – your ultimate tool for taking control of your finances and achieving your financial goals with ease. With a sleek and intuitive interface, enhanced features, and powerful capabilities, the Budget Power-Up revolutionizes the way you budget, offering unparalleled flexibility, customization, and insight into your financial health. Whether you're a budgeting novice or a seasoned pro, the Budget Power-Up empowers you to create, track, and manage your budget like never before, putting you on the path to financial success. The new budget wizard is currently available in Beta.
You can write to us at hello@wealthica.com with feedback.
The new redesign key updates:
- Monthly budget templates with rollover of template to the next month
- Improved graph and visuals
- New monthly and yearly views
- Set multiple groups of budget and nest categories for easy navigation
The new Transactions Rule feature is a game-changer for anyone utilizing the Budget Power-Up, offering a streamlined and efficient way to manage your finances with precision and accuracy. By setting up rules to automatically categorize and edit transactions, you can ensure that your budget remains up-to-date and reflective of your financial reality at all times. This level of automation not only saves you time and effort but also minimizes the risk of errors and oversights, allowing you to maintain a clear and accurate picture of your budgeting progress. Learn how to set up rules to manage your transactions.
It is important to edit any transaction via the pop-up window in the budget wizard or by using the transaction tab in order to get accurate classification of transactions
Steps to Setting up your Budget
- Ensure that your transactions are accurately categorized. Use the prompt to fix uncategorized transactions. If you notice that there are recurrent transactions that are uncategorized, go ahead and set up a rule so all transactions going forward get categorized automatically.In this step, you can also add categories as required.

- Create your Folder
A folder should be the general theme of the expenses or income.
For example, you could create a Folder “Entertainment” and nest the categories “Subscriptions” and “Tickets”; the folder “Food” and nest the categories “Groceries” and “Restaurant” within; the folder “My Income” and nest “Salary” and “Dividend” together.
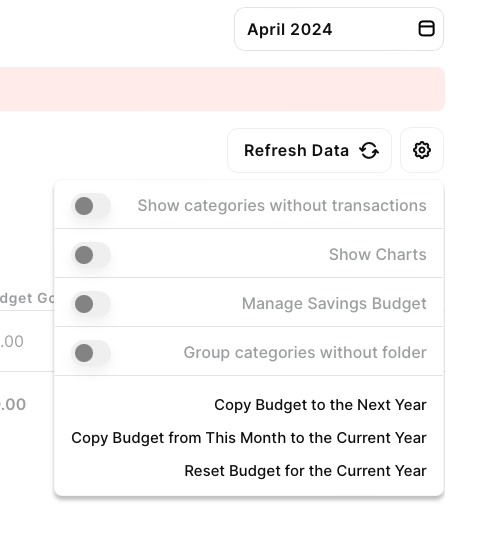
Think of Folders as your main header, and categories to drill down into the subtle category type. - Configure the settings you want by clicking on the cog icon. This includes showing categories without transactions, showing charts, copying the budget for the following year and so on.
- Click on the field under the “Budget Goal” column in order to set the budget allocated to the category for the month. Once you have set the budgeted amount, you can click on the drop down icon to the right of the amount to apply it for the upcoming month only or for the entire year.
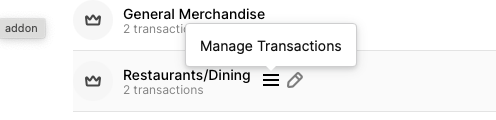
- You can click on the three line icon that appears beside the category name to visualize the transactions included in that category
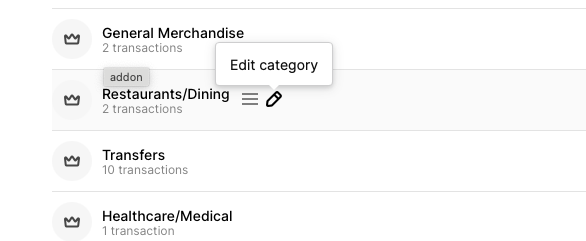
- By clicking on the pencil icon, you’re able to edit the category and set the Icon, name, type and folder.

The budget wizard is currently in Beta and we continue to improve its functionality and polish its design. You can always contact us at hello@wealthica.com with suggestions.